
Craft ideas & projects
How to Photograph Handmade Products with Your Phone
Take clearer handmade product photos with your phone using simple lighting, a five-view shot checklist, honest editing, and practical checks before uploading.
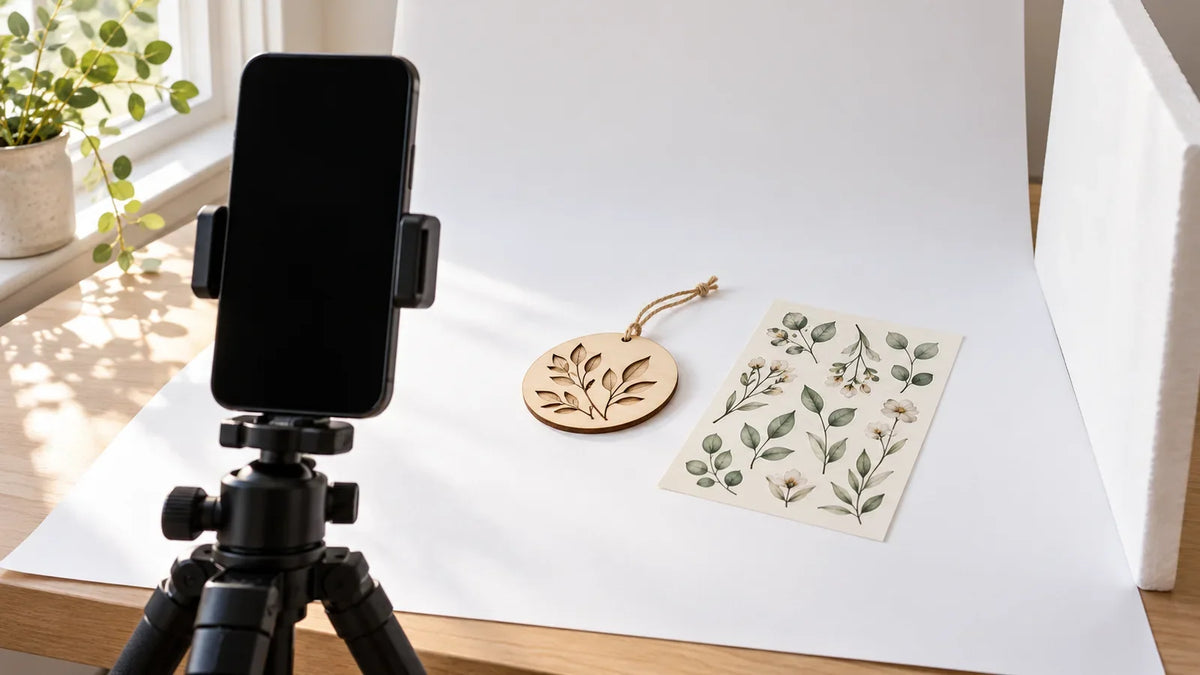
To photograph handmade products with your phone, start with the actual item, a plain background, soft window light, and a steady camera. Capture a clear overall view, then add photos that explain the details, size, back, and contents. Edit for clarity—not to change what the customer will receive.
You do not need a complicated studio to begin. The goal is a useful, repeatable set of photographs: someone should be able to understand the product without guessing which pieces are included or how large it is.
Decide what each photo needs to explain
Before arranging props, write one sentence describing the offer. For example: “One physical sticker sheet containing six designs” or “One personalized ornament with the ribbon shown.” This is a planning example, not a description of a RuyaTreasures product.
Use that sentence to choose the item, quantity, and accessories in your main photograph. If you sell one ornament, a pile of ornaments can make the offer confusing. Photograph the single item clearly first; add a group image only when its purpose and quantities are explained.
For digital files, keep the distinction equally clear. A photograph of a finished craft is an application example, not proof that a physical item ships with a download. Show the actual digital artwork in a separate preview, preserve its design, and identify any mockup as a mockup.
Build a small setup you can repeat
Start with a table beside a window, a clean white background, and a securely supported phone. Avoid direct sunlight falling across the product. Turn off competing room lights for this window-light setup. If the shadow side is too dark, place white card outside the frame to reflect some light back. These are simple setup options described in Shopify’s product photography guide.
For a small standing object, curve the background behind it instead of folding a visible corner. Keep the phone position consistent while you adjust the product. Before photographing multiple items, note the camera position, background, and time of day so you have a starting point for the next session.
Use the background to separate the product from the scene, not to add a competing pattern. If a pale edge disappears, change the setup until you can see the full outline. Do not solve that problem by painting a darker outline onto the product afterward.
Prepare the phone and take one useful test frame
- Check the lens and case. Remove fingerprints gently with a soft, clean cloth, following your phone maker’s care instructions. Google notes that obstructing cases or accessories can affect focus on some Pixel devices in its camera troubleshooting guidance.
- Start with ordinary Photo mode. Keep your first image simple. Check the result before choosing special effects or modes that may change the product’s appearance.
- Frame the complete product. Leave space around the edges for the final crop. Keep the camera facing a flat sticker sheet squarely rather than tilting it for the main overview.
- Wait for focus. Google’s Pixel camera instructions say to point the camera, wait for focus, and then take the photo. For other phones, use the manufacturer’s instructions for selecting focus and adjusting brightness.
- Inspect the saved image. Enlarge the important detail: a cut edge, printed letter, stitch, or personalization. A sharp preview at small size is not enough to judge a detail photo.
If the important detail is not clear, change one thing before taking another frame: steady the phone, improve the light, or move far enough away for the camera to focus. Do not keep shooting an entire collection with the same unresolved problem.
Use a five-photo checklist for each handmade item

1. Overall view: what is being sold?
Show the complete product without a prop hiding part of it. For a sticker sheet, include the sheet edges. For an ornament, include the hanging hole or attachment if it is part of the item. This is the image that should make sense even as a small thumbnail.
2. Detail: what should the customer inspect?
Choose a close view that answers a real question: the printed detail, the stitching, the surface finish, or the personalized lettering. Keep the real texture visible. If you are photographing homemade stickers, our inkjet sticker-making guide is a useful companion for planning the physical sample before the photo session.
3. Scale: how big is it?
Place a ruler beside the item on the same surface, with its markings readable. Keep the ruler from covering the product. Include written dimensions in the listing too; a hand or a mug alone is an ambiguous size reference.
4. Back or edge: what is not visible from the front?
Show the reverse, attachment, thickness, or construction when it affects someone’s choice. For a vinyl ornament, an edge or back view may explain the blank better than another decorative front angle. See our personalized vinyl ornament workflow for the craft context.
5. Contents: what arrives together?
Arrange the included pieces so they can be counted. If packaging is included, show the actual packaging. If you add styling props, make their role clear and keep a separate image that shows only the purchase contents.
Not every product needs exactly five images. Combine views when one genuinely answers two questions, and add a view when an important question is still unanswered.
Fix common craft-photo problems at the setup
- Glare covers a glossy sticker. Try a small change to the product or camera angle, then check whether the artwork remains readable. Keep a straightforward overview as well as a finish-detail shot.
- Personalized text looks small. Add a dedicated detail photo rather than cropping the main photo until the entire object is lost.
- A rounded item looks different from one side. Include both the overall shape and the important side view. Do not stretch the photograph to make the silhouette match your expectations.
- Props overpower the item. Remove them for the main image. A lifestyle scene should explain use, not make the buyer search for the product.
- Colors look unlike the item beside you. Recheck the lighting and remove strong filters. Compare the image with the actual item before accepting it; screens and viewing conditions can still differ.
Edit a copy and preserve the original
Keep the original photographs. Work on copies for cropping, straightening, and small brightness or color corrections. Stop when the product is clearly represented—not when it looks like a different material or a more saturated version of itself.
Do not erase a permanent feature, smooth away a handmade texture buyers will receive, change personalization, or add items that are not included. If removing the background cuts into a transparent edge or fine thread, use the clean original-background photograph instead.
For your upload copy, check the destination’s current file requirements, retain enough pixels for detail viewing, and inspect the exported file before uploading it. A large file size or a high DPI label is not a substitute for checking the actual image. Review both the thumbnail crop and the enlarged product view on the finished page.
Before you call the photo set finished
- Is the whole product visible in at least one image?
- Can the buyer distinguish the included items from props?
- Are the important detail and size clear?
- Does the finish and color still resemble the real item?
- Are digital previews or mockups identified accurately?
- Have you kept the originals and checked the exported copies?
For your next session, start with one item and complete this checklist before repeating the setup for the rest. A small, informative photo set is more useful than a large collection of attractive images that leave basic product questions unanswered.


Comments & Reviews
Be the first to share your thoughts.