
Craft ideas & projects
15 Handmade Product Ideas You Can Sell at Craft Fairs
Compare 15 handmade craft fair product ideas by preparation, packaging, display, and customer use. Build a focused range without guessing what will sell.
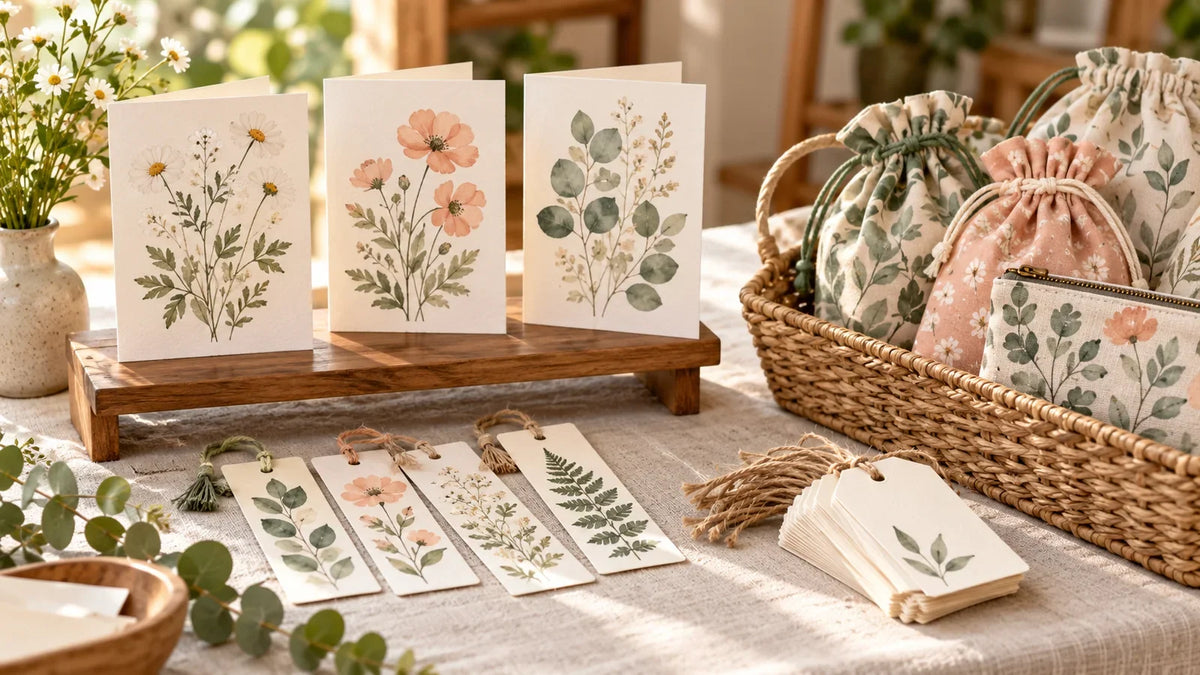
Choose craft fair products you can make consistently, pack without damage, and explain at a glance. Greeting cards, bookmarks, sticker sheets, small textile accessories, and lightweight decor are useful starting points—but the right mix depends on the event and your skills, not a universal bestseller list.
Use these 15 handmade product ideas to build a small, coordinated range rather than making everything at once. Each idea includes a preparation decision and a display detail, so you can compare the work behind the finished item.
Choose for the event before choosing your inventory
Ask the organizer who the event is intended for, which product categories are accepted, and what space you receive. Read the vendor terms before committing to inventory. A product that suits a holiday gift market may need different packaging or a different theme at a year-round art fair.
The U.S. Small Business Administration’s market research guidance recommends investigating the customer, demand, competing options, and location. For this project, turn that into a practical question: Who will use this item, and can I show that use clearly on my table? These ideas are possibilities to evaluate, not verified demand rankings.
Paper products that can share one coordinated display
1. Greeting card sets
Build a collection around a clear occasion, such as thank-you notes or everyday encouragement. Choose one card size and matching envelopes before designing the range; mismatched sizes make both packing and display harder.
Show one open sample so shoppers can see whether the inside is blank or printed. Keep the sale copies protected, and state the number of cards and envelopes in each set. Check that every folded card closes neatly rather than judging only the printed front.
2. Bookmarks
Offer a small series of original illustrations or patterns with a shared theme. Keep the shape comfortable inside a closed book; bulky layers deserve a real-use trial before you make multiples.
Display one bookmark in a plain sample book and arrange the others upright by design. State the finished dimensions. If you add tassels, plan how to keep them from tangling during transport instead of piling loose bookmarks in a bin.
3. Gift tag packs
Make tags around a specific use: birthday presents, handmade gifts, or a seasonal wrapping palette. Decide whether string is included and leave enough writing space for the recipient’s name.
Package a fixed count together, with a visible example of the reverse side. One empty wrapped box can demonstrate scale without using up your whole table. For related presentation ideas, see our Christmas packaging and gift-wrapping sticker guide.
4. Sticker sheets
Give each sheet a specific purpose, such as a coordinated journal theme or a set of decorative gift seals. Check the finished cut, peel, and print—not just the artwork on screen—before committing to a batch.
Show the full sheet and identify its dimensions and sticker count. Describe only the material and uses you have established; do not add waterproof, outdoor, or dishwasher-safe claims by assumption. Our home inkjet sticker-making guide covers a small production trial.
5. Journaling label packs
Unlike decorative sticker sheets, these solve a writing problem: titles, dates, lists, or short notes. Start with a few useful label shapes and check whether the intended pen writes clearly on your chosen surface.
Display a sample journal page showing the available writing area. Keep the packaged count and size assortment consistent, and identify whether the pieces are adhesive labels or loose paper pieces. A buyer should not have to guess.
6. Mini art prints
Create a small original print series that works individually as well as together. Select a finished paper size first, then decide whether the artwork includes a border. Proof the actual print so that cropping and important details are not surprises.
Use a clearly identified display frame and state whether the frame is included. Put the print dimensions on the packaging, separate from the artwork dimensions if they differ. Pack stock with enough support to protect the corners.
7. Paper garlands
Choose a lightweight motif that repeats attractively: leaves, geometric shapes, or a seasonal design. Make a complete sample and measure its finished hanging length, rather than counting pieces and guessing the result.
Hang one sample within your permitted display area. Pack the others around a card or in a way that keeps the string organized. Tell buyers the length and what hanging accessories, if any, are included; do not imply that the display hardware comes with the product.
8. Place card sets
Sell blank, hand-finished place cards that buyers can write on themselves, or offer a separate custom-order service. Choose a fold and paper combination that stands reliably on a level table.
Show one written sample and one blank sample. Label the pack count and writing area. If names are customized after the fair, record the spelling, quantity, delivery method, and agreed completion date instead of promising immediate production.
9. Hand-decorated notebooks
Use a consistent notebook size and develop a distinctive cover treatment, such as original printed art, paper layering, or your own cut design. Check that the notebook opens comfortably and that added details stay clear of the binding.
Describe a purchased notebook with a decorated cover accurately; do not call it hand-bound unless you made the binding. Display an open sample to show the page style, and label whether the pages are lined, dotted, or blank.
Textile and decorative products with a different feel
10. Reusable fabric gift bags
Choose a manageable set of sizes and make the closure part of the design. A drawstring bag and a tie-top bag have different construction steps; standardize one before expanding the range.
Display a filled sample with a neutral prop, but make clear that the prop is not included. Provide finished dimensions and care information appropriate to the materials. Keep flat stock sorted by size so shoppers do not need to unfold every bag.
11. Sewn zipper pouches
Focus on a defined use, such as organizing stationery, rather than offering numerous almost-identical sizes. Choose the finished size, lining, and zipper arrangement before cutting multiple pieces.
Open and close each finished pouch and inspect the lining and seams. Show an open sample with a few familiar objects for scale, identified as display props. Avoid promising that it fits a particular device unless you have checked the relevant dimensions.
12. Embroidered patches
Create a coordinated set of original motifs and standardize the edge finish. Decide whether you are selling sew-on patches or patches with another attachment method; that decision changes what the buyer needs to know.
Mount each patch on a backing card with its size and attachment instructions. For any heat-applied backing, follow the specific backing supplier’s directions and identify compatible uses rather than inventing a universal temperature or application time.
13. Crochet coaster sets
Choose a pattern and yarn combination you can repeat consistently. Make a complete set first and check that the pieces lie flat and are reasonably consistent in size. Photograph or note the finished dimensions for your own production reference.
Display one set open and package the others with their quantity, fiber information, and suitable care directions. Keep the description to the intended coaster use; do not advertise them as heat-resistant trivets or protective hot pads without appropriate evidence.
14. Decorative felt ornaments
Build a small family of simple shapes with distinct stitched details. Standardize the hanging loop and finishing method, then account for the time spent on hand stitching and assembly—not just cutting felt.
Use a compact stand to show how the ornaments hang. Package them so loops do not tangle. Describe them as decorative ornaments, not toys, and consider the intended user and applicable product requirements before selling.
15. Decorative paper flowers
Offer a small arrangement, a single statement bloom, or a coordinated set rather than several unrelated formats. Make a finished sample to learn how much storage and packing space the petals need.
Display the flowers in the form you sell. If a vase is only a prop, say so. Choose packaging that protects the shape without making the item difficult to carry around the fair, and keep these positioned as decor rather than food-contact cake decorations.
Narrow the list with a simple preparation check
For each shortlisted product, write down four things: the finished sample you can make now, the steps you can repeat, the space it needs on the table, and how it will travel home with the buyer. Leave out an item if you cannot yet answer one of those questions.
- Mostly paper-crafting tools: Compare cards, bookmarks, and tags. These can share a visual theme while serving different uses.
- A sewing setup you already use confidently: Compare gift bags and pouches. Avoid adding unfamiliar construction methods just to broaden the table.
- Limited transport space: Compare flat products with bulky flowers or hanging displays before choosing your mix.
- No capacity for custom work at the event: Bring ready-made products or take clearly documented later orders; do not build the range around instant personalization.
If you still need to practice a making technique, our beginner Cricut project guide can help you choose a trial project. A successful sample is a starting point, not evidence that a large batch will sell.
Plan one coherent table, not 15 separate product lines
Here is a hypothetical starter mix: illustrated greeting cards as the main range, coordinating bookmarks as a second format, and gift tags as a small companion product. Use the same visual theme, but give each item a clear job. This is an organizational example, not a recommended stock quantity or sales forecast.
Set up a trial display at the dimensions the organizer gives you. Check whether a person can identify the item, see the price and pack quantity, and reach a sample without moving other stock. Keep protected sale copies and replenishment stock separate from handled samples.
Time a small production run, including finishing and packaging. Use your own material costs, labor time, event expenses, and selling fees when setting prices. A simple-looking item is not automatically inexpensive to make, and another vendor’s price does not establish your costs.

Before committing to the fair
- Confirm the organizer’s handmade criteria, accepted categories, table dimensions, display restrictions, and any rules for on-site equipment.
- Check the registration, tax, labeling, safety, and insurance requirements that apply to your location and particular products. This list is not a substitute for those checks.
- Use original artwork or confirm that the actual design, font, or pattern terms permit your intended sale. Keep a record of the terms; buying a file does not answer every usage question.
- Check every package for the correct product, quantity, dimensions, and any included accessories or care instructions.
- After the event, record what sold and the questions people asked. Use that evidence—not assumptions about “best sellers”—to decide what to make next.
For U.S. copyright questions, the Copyright Office’s permission guide explains how to identify a rights holder and request permission when needed. It does not determine the terms of an individual craft design license.
Start with the products you can finish reliably and present clearly. A focused range with accurate descriptions gives you a more useful first experiment than a table full of unrelated projects.


Comments & Reviews
Be the first to share your thoughts.